Documentation
Court Reservation is easy to use – but still some stuff needs explanation. Here you find a documentation to the Plugin.
Documentation Website as a Service
Documentation WordPress Plugin
Quickstart Guide Website as a Service
With only a few clicks you can start your Website with Online Court Reservation. Completely free trail for 14 days.
1. Setup Website
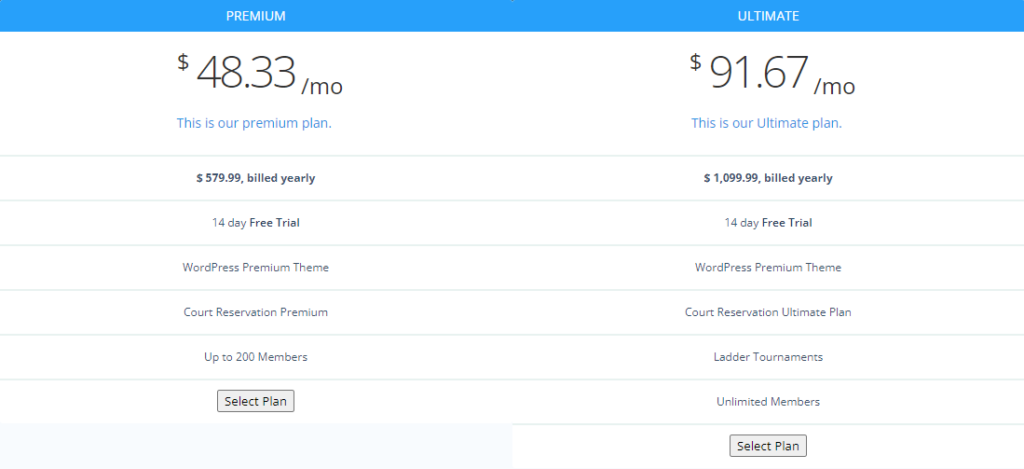
To start creating your own website, go to https://courtreservation.io/pricing/
There you can select between our PREMIUM or ULTIMATE subscription plan.
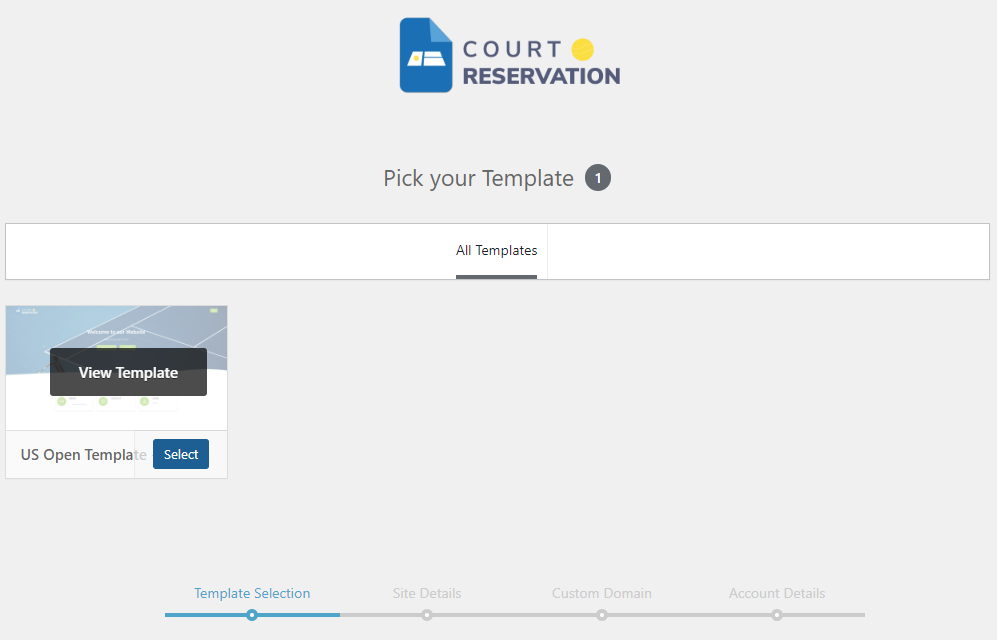
In the next step you can SELECT a design template.
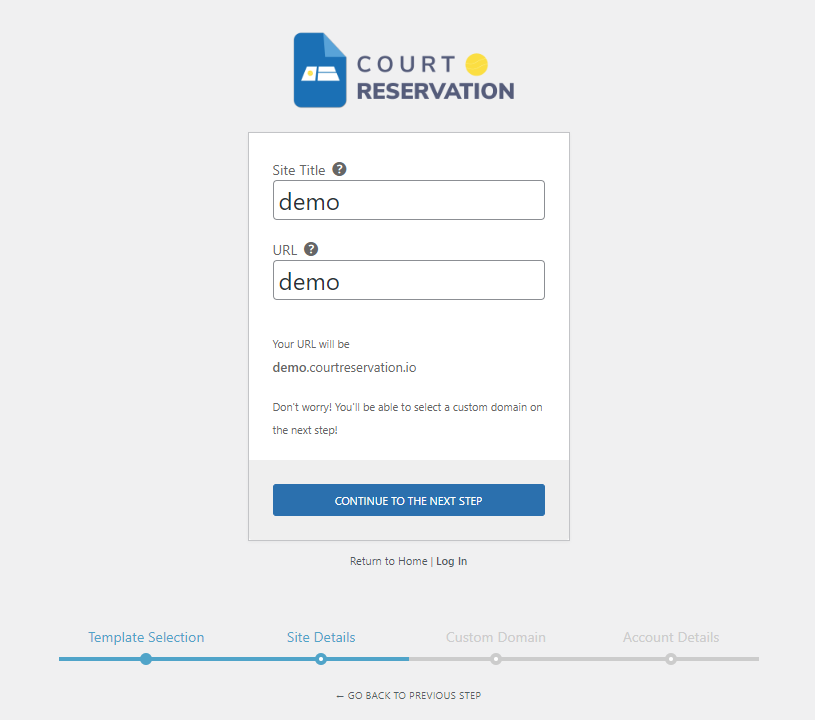
Under “Site Detail” you can choose a Site Title and URL for your website. The URL is not changeable after the setup.
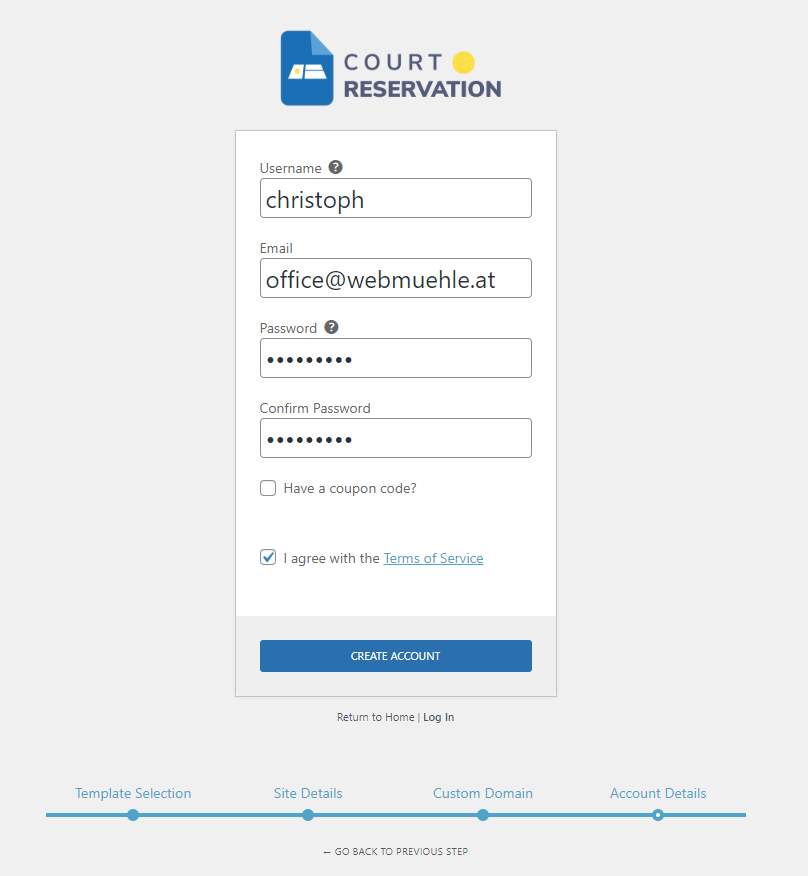
In the last step of the setup, you put in your user details. After clicking “CREATE ACCOUNT” we will automatically create your website for you.
After the site has been created you can login with your previously created user.

2. Setup Court Reservation
You can log in into your website using https://yourURL.courtreservation.io/wp-admin/
There you find your WordPress Dashboard.
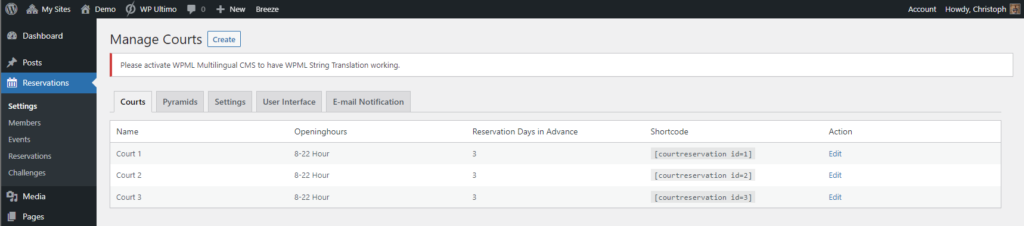
Under “Reservations” you can find all settings regarding the Court Reservation.
As default already 3 courts have been set up for you. You can either Edit them, or Create new ones if you need more.
If you are in the Ultimate plan you have a “Pyradmids” tab, where you can create Ladder Tournaments. 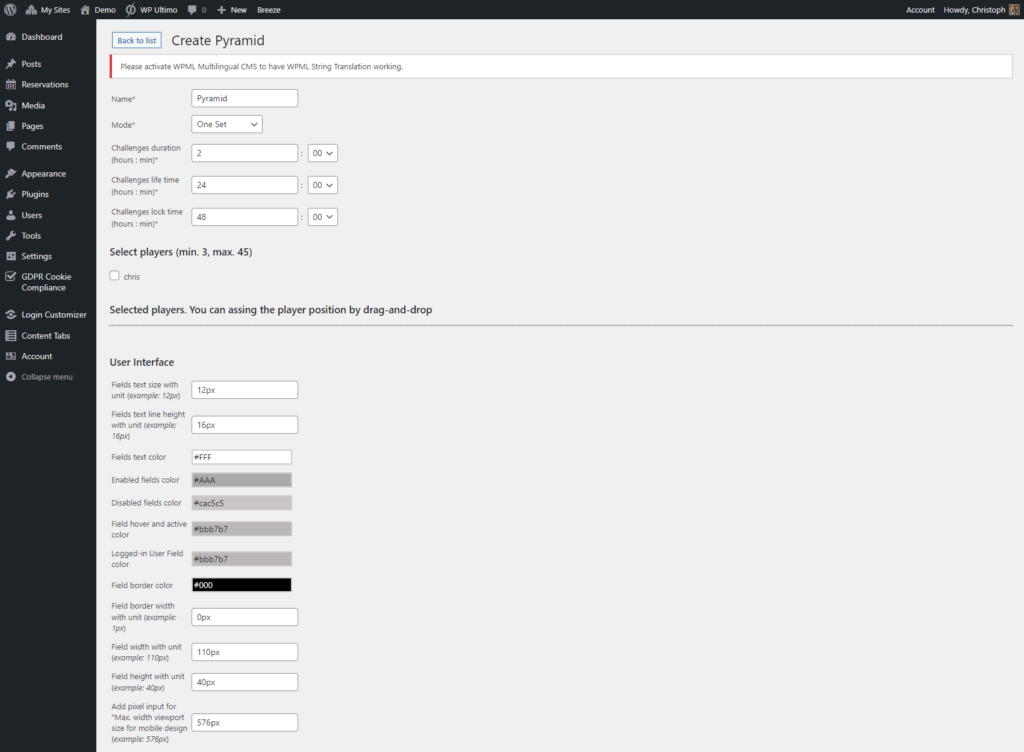
In the “Settings” tab you have general settings and you have to set up at least 1 reservation type. (E.g. Single, Double, etc.)

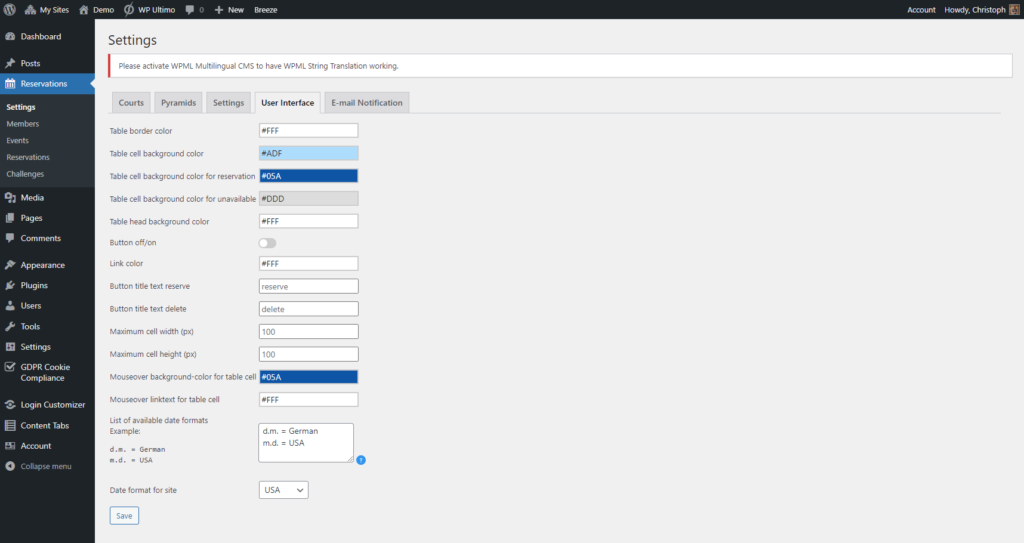
Under “User Interface” you can already customize the reservation table how you like it.
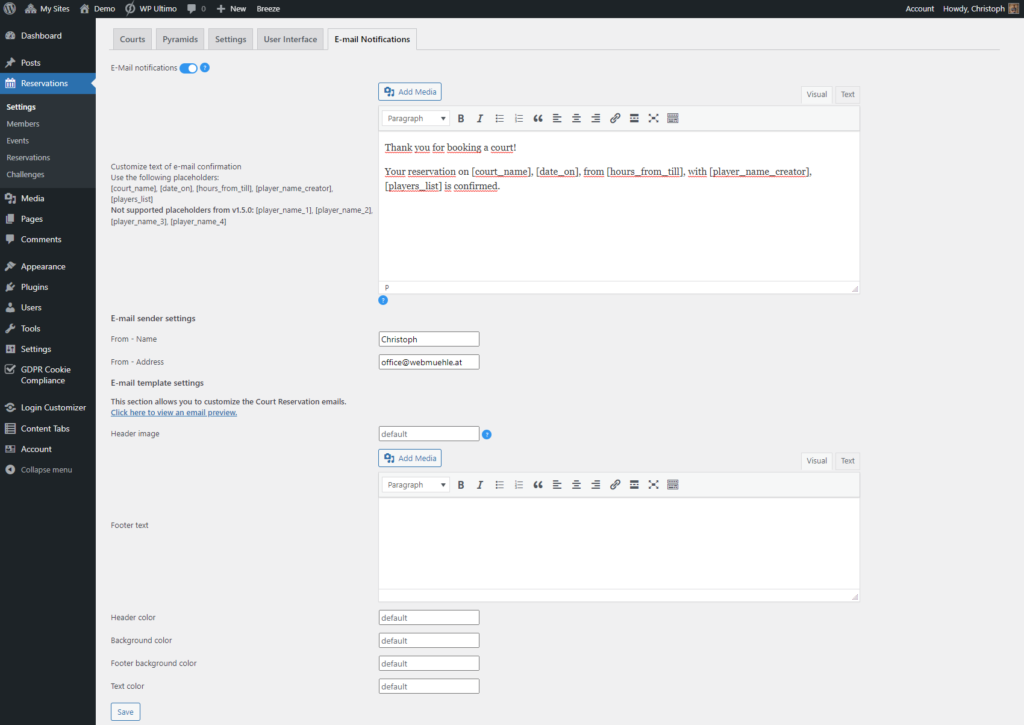
If you activate E-Mail notifications users get e-mail once the do a reservation.
Finally you have to setup the users which you want to be able to do reservations.

Customization Website as a Service
After you are finished with the setup, you can start customizing your website.
Change Logo
You can visit your website typing in your URL into your browser adress bar. In our case the URL is https://demo.courtreservation.io/
If you are already logged in you than click on the “Customize” link in the top-bar.
![]()
It opens up a menu, where you can find all custimazion entries.
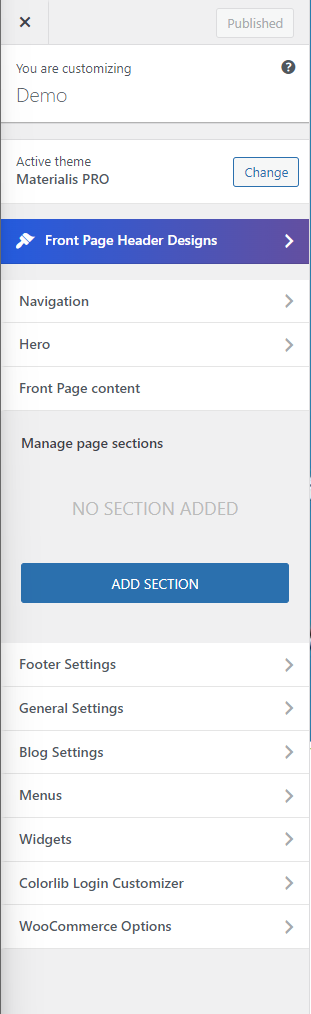
If you want to change the logo, you navigate to “General Settings -> Site Identity” and click “Change logo”. In the window which opens up you upload your logo from your computer.
After you are done, you click “Publish” on the left-upper menu.
Change Background
You can visit your website typing in your URL into your browser adress bar. In our case the URL is https://demo.courtreservation.io/
If you are already logged in you than click on the “Customize” link in the top-bar.
![]()
It opens up a menu, where you can find all custimazion entries.
If you want to change the logo, you navigate to “Hero -> Front Page Hero “ and click “Options“ besides the Background Type. Under Header Image you click “Select file” to upload your background from your computer or browse through the Media Library.
After you are done, you click “Publish” on the left-upper menu.
Quickstart Guide WordPress Plugin
Here you find a short how-to-guide on installation and getting started with Court Reservation
1. Installation
Automatic installation is the easiest way to install Court Reservation.
To do it, log in to your WordPress admin panel and go to : Plugin -> Add New and click on Upload Plugin.
Select the zip file and click on Install Now. After clicking that link, you will be asked if you are sure you want to install the plugin. Click yes and WordPress will automatically complete the installation process.
2. Upgrade
After the successfull installation of the free version of Court Reservation on your WordPress site you can upgrade to the premium features without having to install a new version.
To do it, log in to your WordPress admin panel and go to : Reservations -> Settings -> Upgrade. There you can select a plan and follow the purchasing process.
Once you receive a license key via e-mail you can activate your license under: Plugins -> Installed Plugins -> Court Reservation -> Activate License
3. Create Courts
Log in to your WordPress admin panel and go to : Reservations -> Settings.
On the above left corner click on “Create”. Put in name and opening hours of your court.
After clicking “Save” your court is beeing created. In the overview you now see a shortcode, which you can integrate anywhere on your site.
4. Create Events
Log in to your WordPress admin panel and go to : Reservations -> Events. There you can create individual, or weekly events.
On the above left corner select click on “Create”. Put in name, date and on which court the events is. Again, by clicking “Save” your event is beeing created.
5. Create Members
Log in to your WordPress admin panel and go to : Reservations -> Members. There you can create your members.
On the above left corner select click on “Add new”. Put in name and e-mail-adress. By clicking “Save” a new user is being created. If you ticked “Send the new user an email about their account” the new member receives an E-Mail notification. New users have to change their password on first login.
Customiziation
You can do the following customizations with Court Reservations.
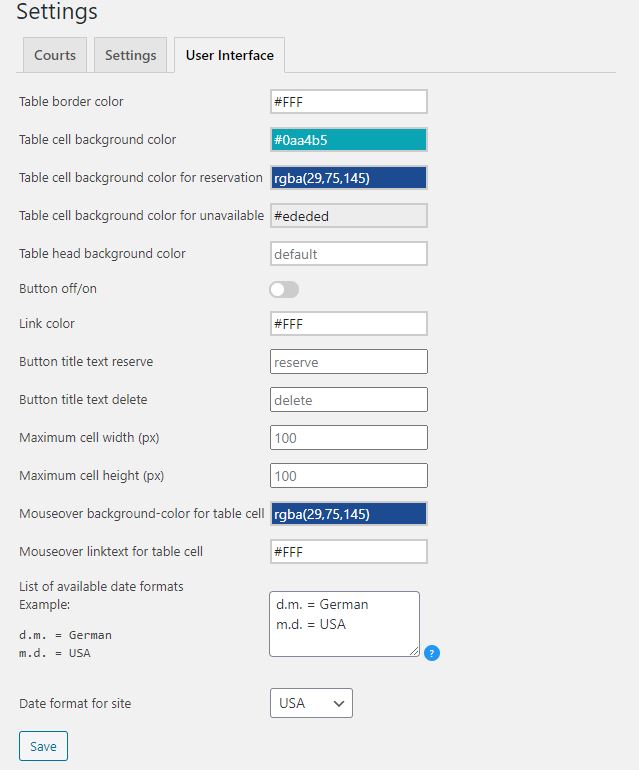
1. User Interface
Log in to your WordPress admin panel and go to : Reservations -> Settings -> User Interface.
There you can customize your reservation table. See following example on how the settings for our demo look like:
2. Tab-Navigation
A nice way to organize several courtsa on one site, is by using a tab-navigation. There are several plugins which can do this. One we recommend is Tabs.
Request a Feature or report an Issue
Do you have any other questions? Feel free to contact us!