Step-by-step – How to create a tennis club website in 15 minutes
In this step-by-step guide, we’ll show you how you can build your own tennis club website including an online reservation system for your tennis club in just 15 minutes.
This tutorial is written for beginners. That means, you will learn how to build a website that you will be proud of, even without a programmer and web designer. WordPress is the most popular content management system for creating websites.
All you need is the following:
– STEP 1: Website hoster and domain – SiteGround
– STEP 2: Premium WordPress Theme – Divi
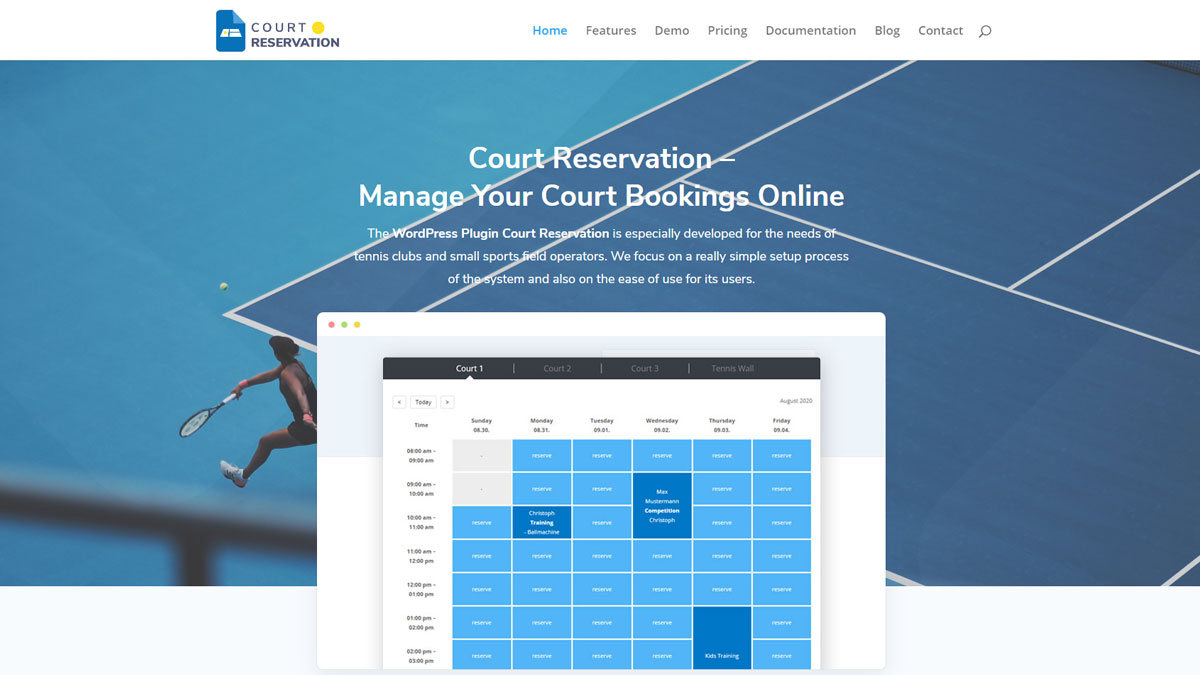
– STEP 3: Online reservation system – Court Reservation Plugin
Step 1 -Webspace & Domain for your tennis club website
Choose a web host to save your website on.
First, you need a web space and a domain for your future club website. To get one, you have to register your site with a hoster like SiteGround. Go to siteground.com and choose WordPress Hosting -> GET STARTED.
In this window you can select the “plan” of your website. The StartUp plan should be sufficient for your club page! After choosing the plan, you can choose a domain for your tennis club website.
Once you have found a suitable domain, all you have to do is fill in the order details and provide a payment connection. After you have clicked PAYNOW, the order is complete, and you have secured the domain and the appropriate web space. CONGRATULATIONS!
Before you start building your website, you should install a SSL certificate on your web space. SSL is a security certificate and if you don’t have one, a message appears in modern browsers that your website is not secure because the data is not transmitted in encrypted form.
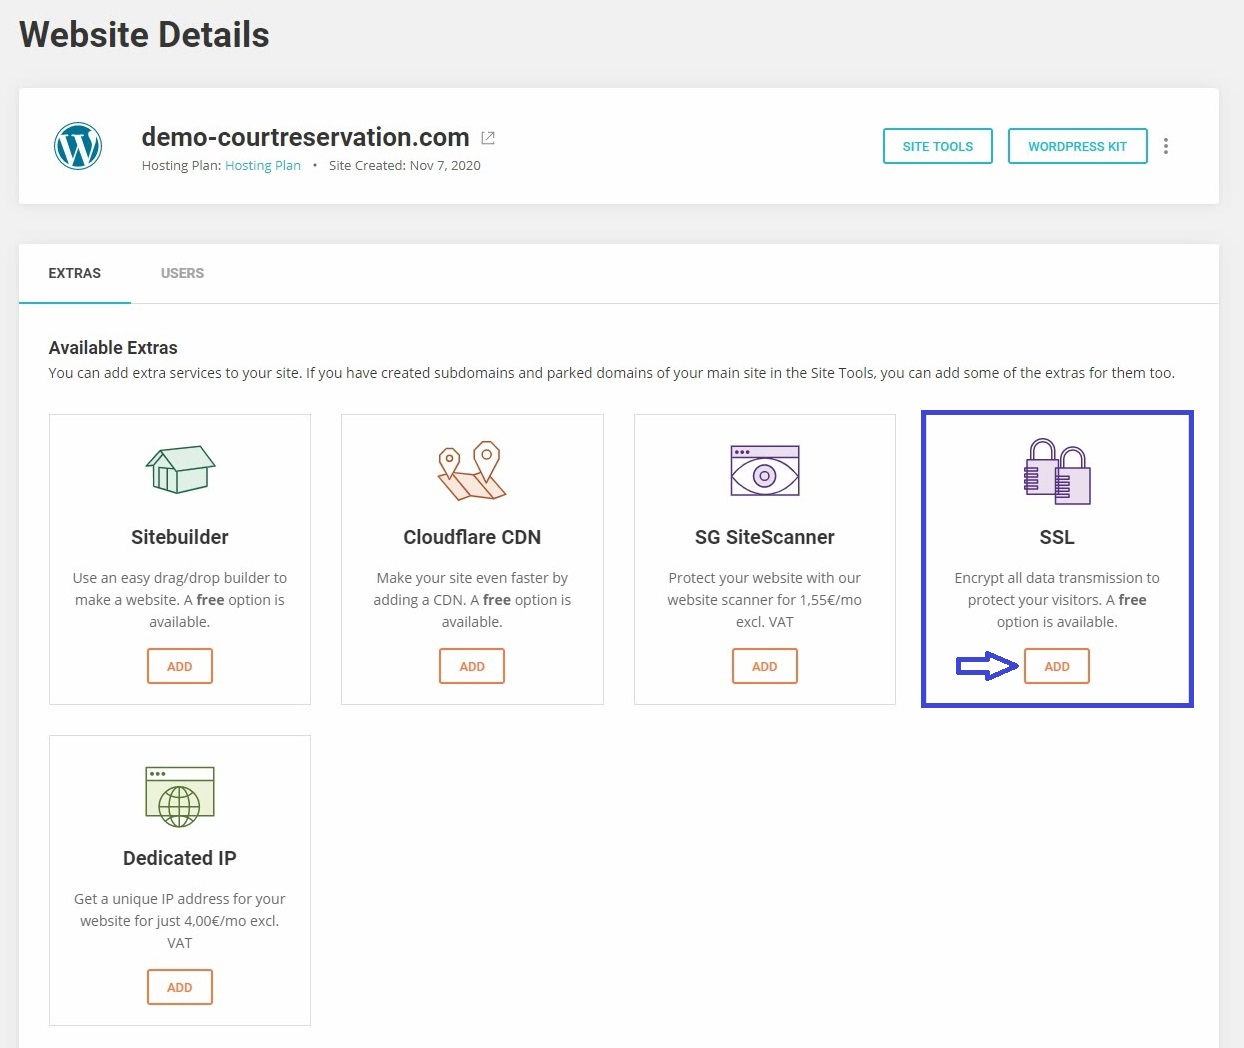
To install one, switch to the Siteground dashboard (my.siteground.com) and go to the Hosting Plan tab. There you will find your address – with a click on MANAGE you will get to a menu for extras. There you select SSL -> ADD.
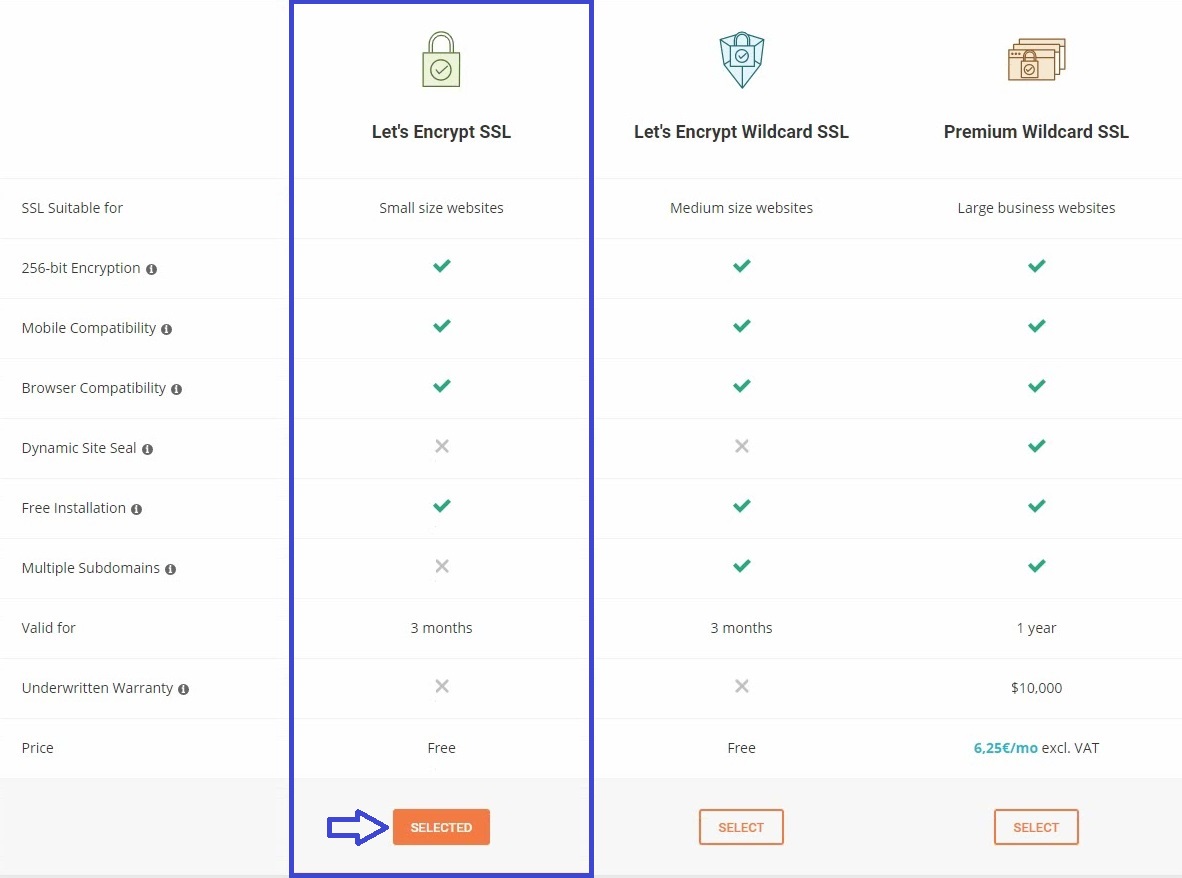
There are different SSL certificates. But for your club page, a free Let’s Encrypt is completely sufficient. So click SELECT and ACTIVATE so that the security certificate is installed on your web server.
In the meantime, you have probably received an email telling you to verify a domain. Follow the link and the description in the email to do this too!
STEP 2 – Now it’s time to build your tennis club website
Now you can finally start building your website.
Your website can either be accessed via the my.siteground.com dashboard, or you can enter the address of your site directly into the address bar of your browser. In order to log into the “backend” of your website, you have to add /wp-admin at the end of your internet address. For example www.demo-courtreservation.com/wp-admin.
You will now see this screen. Since we use our own theme, you can click EXIT here.
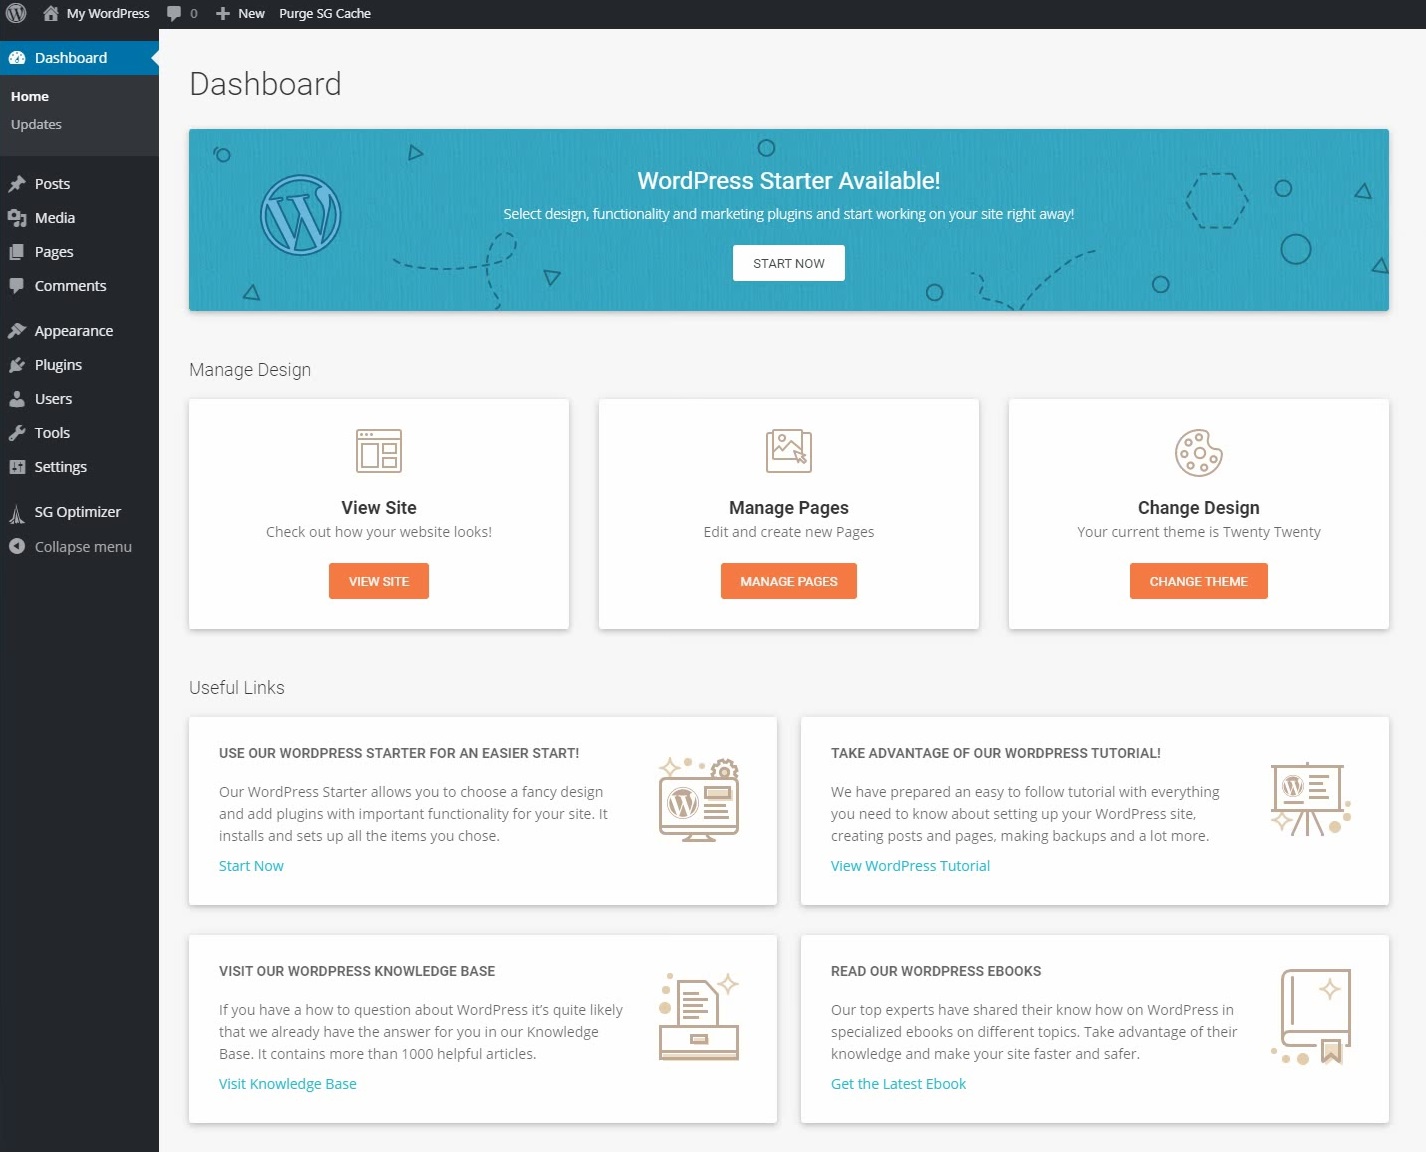
This is what the backend looks like. We now want to install our premium theme Divi in it. DIVI is probably the best WordPress theme that you can buy. In addition to the simple construction of the individual pages using the visual editor, the theme also offers a large number of ready-made pages which can easily be imported and then work away from them. Entire website projects can be implemented in just a few hours.
The theme can be purchased directly on its website. https://www.elegantthemes.com/join/
Choose the Yearly Access plan for $ 89 per year. The subscription can then be canceled. You can of course continue to use the theme, after your subscription has expired!
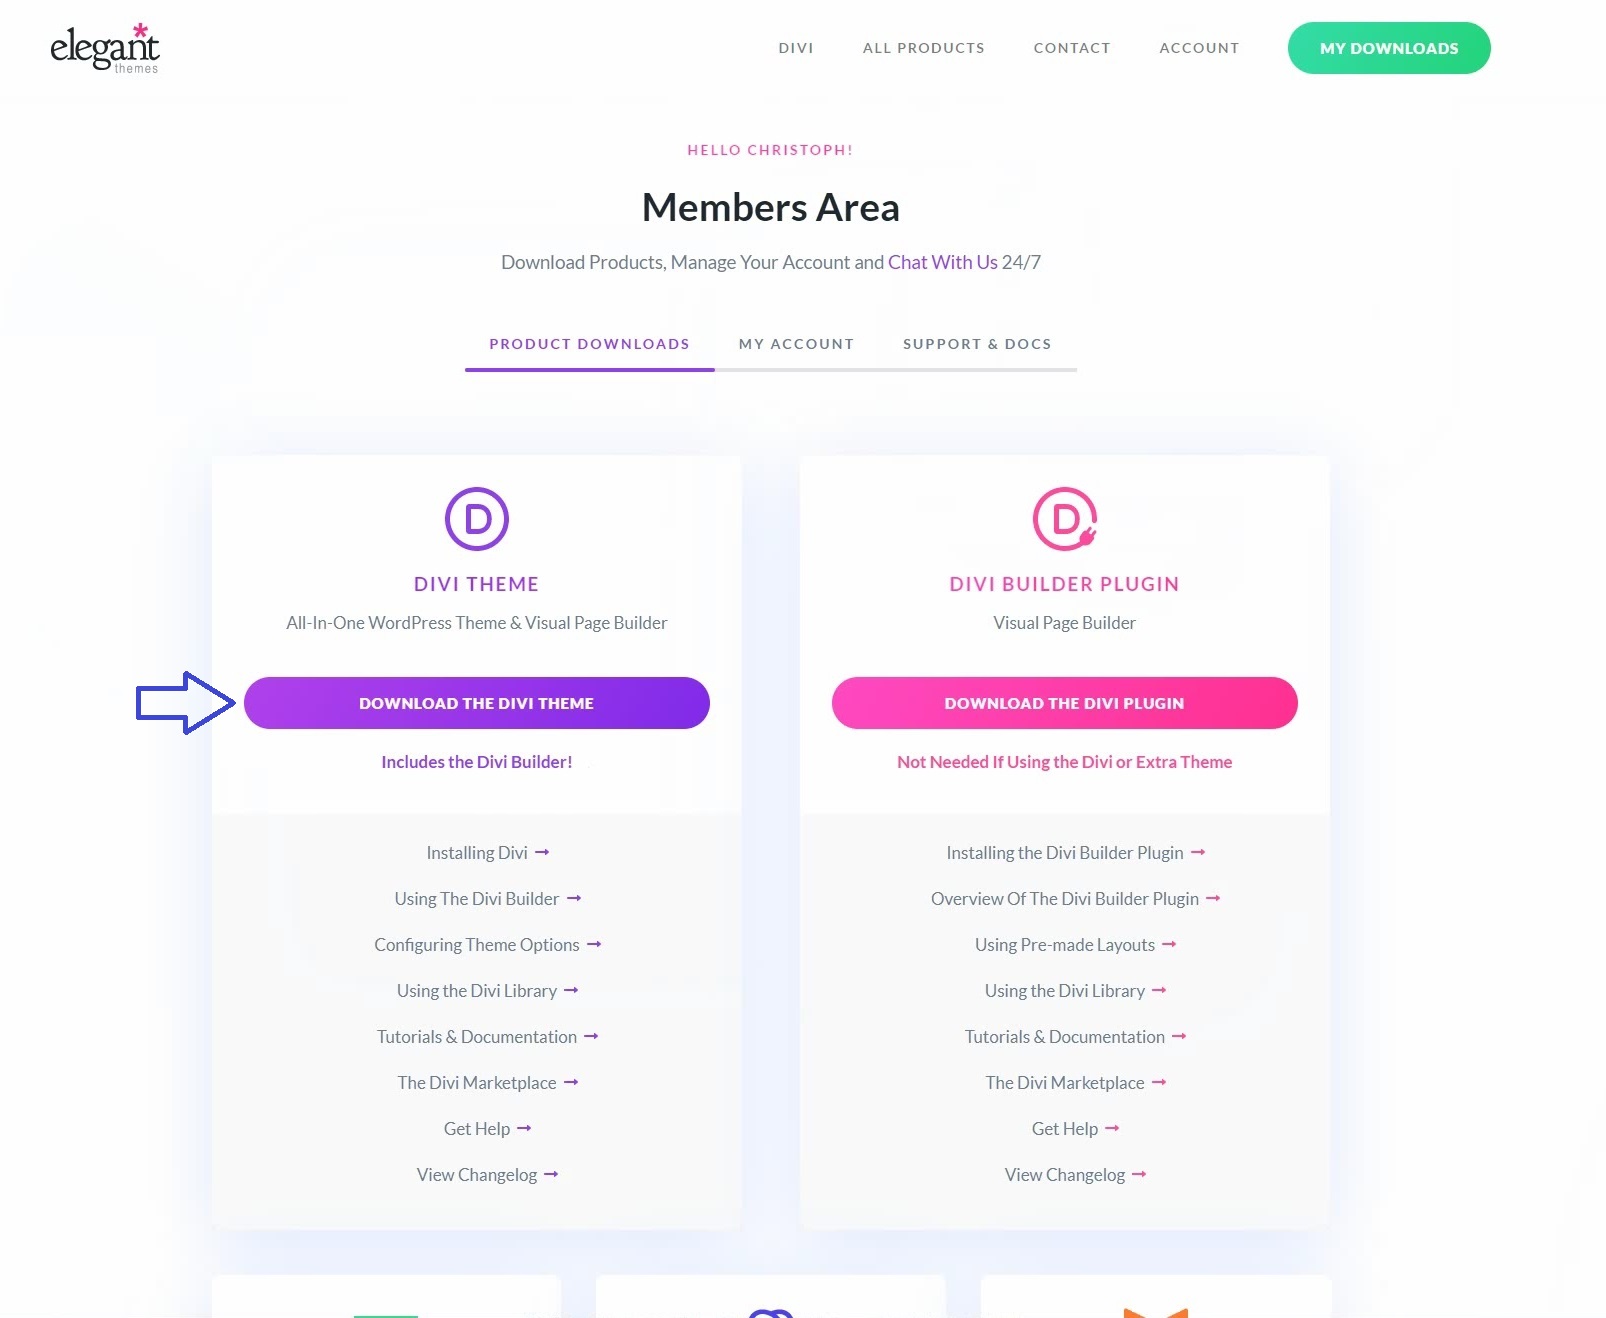
After completing the registration form, you can download the Divi theme in the members area!
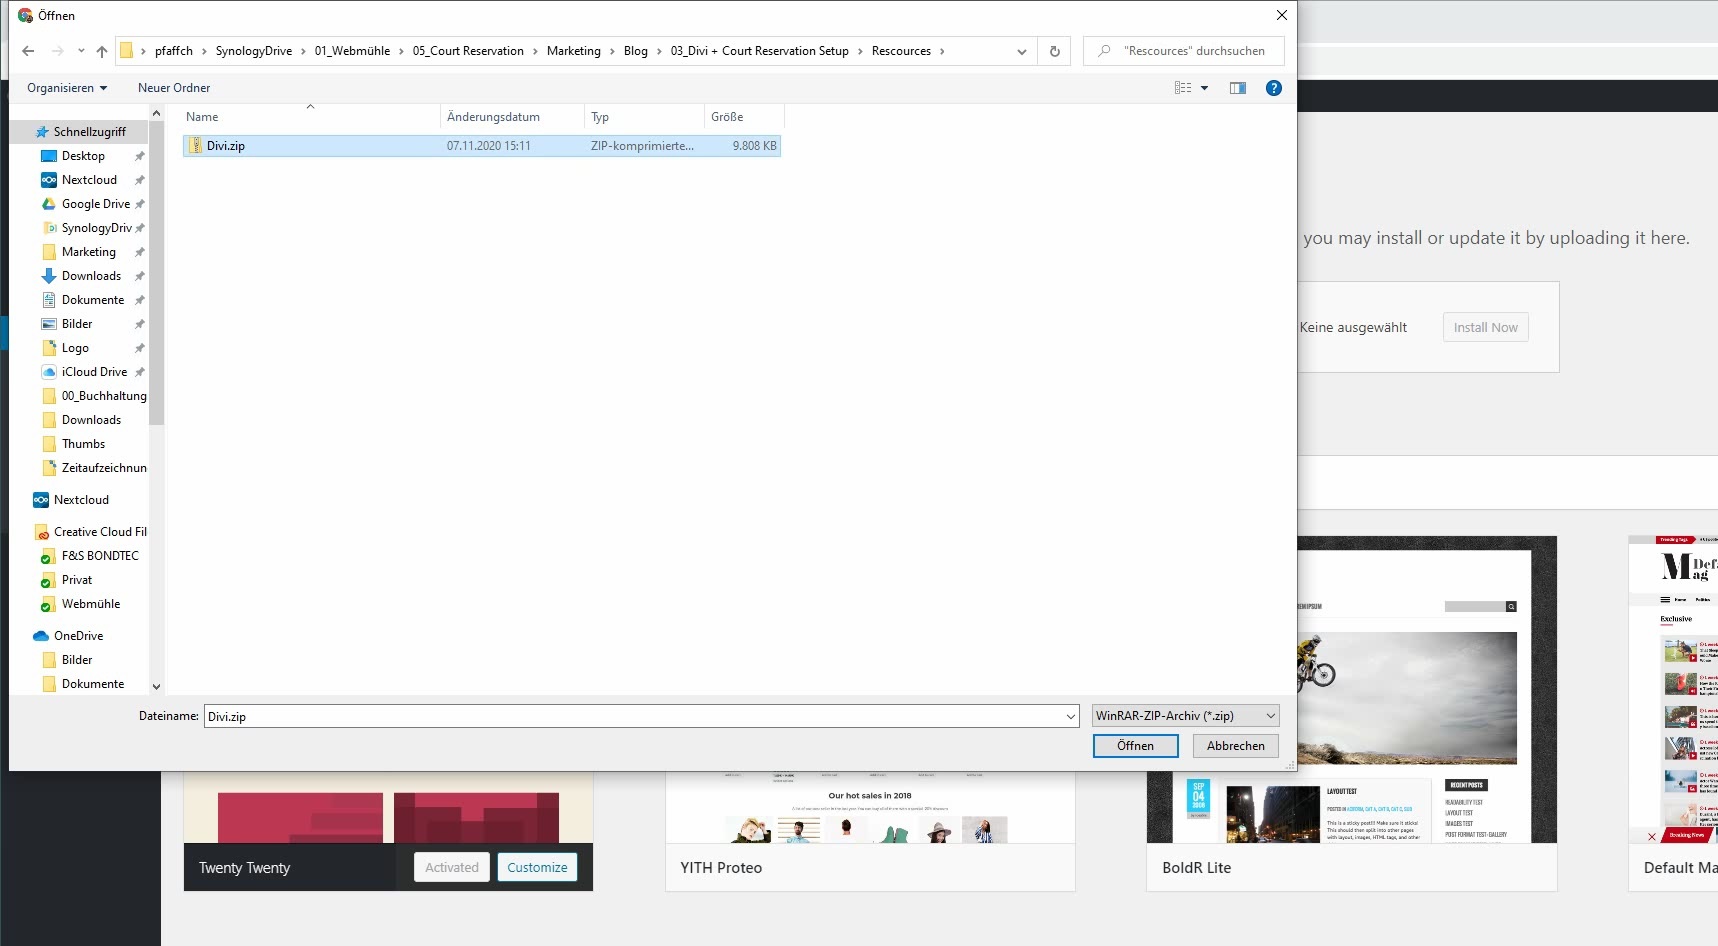
We now switch back to our WordPress admin panel and install the theme that has now been downloaded. To do so, we look for Appearance -> Themes -> Add New -> Upload Theme in the side menu. There we look for the downloaded .zip file. After that we click Install and Activate.
Next, we can start building the first page. We go to Pages -> Create new page in the backend. We can now choose whether we want to create a blank page, where we want to create the content ourselves from scratch, or whether we import premade content and then adapt it to our wishes. Both are extremely easy and quick with the Divi Theme.
In this case we only want to create one page with the reservation system. Therefore, we start with a blank page in which we integrate our reservation system.
We select Start Building.
After the page is created we will first save it. We will come back to this point later and continue from there.
STEP 3 – Installation of Court Reservation System
Easy and quick integration of court reservation system. Further information on the setup is also under our Documentation section.
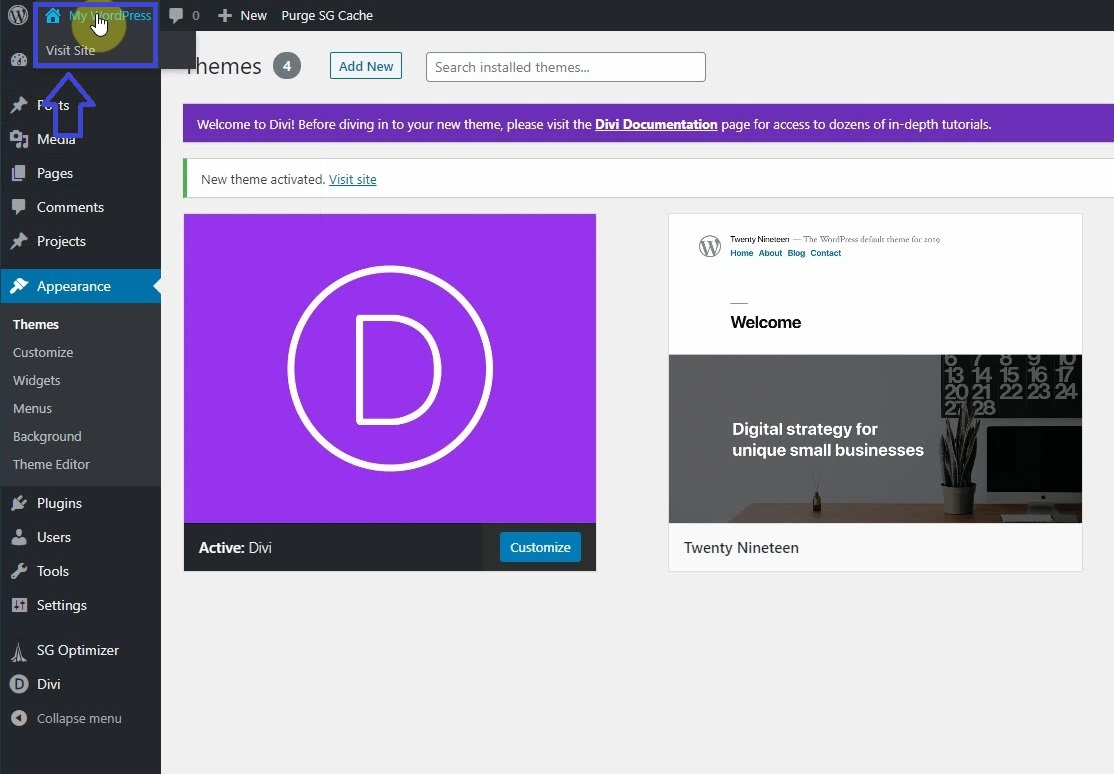
The next thing we want to do, is to install the plugin Court Reservation and integrate it into the page we have just created. We are therefore going back to the WordPress Admin Backend (top left -> Go to Dashboard). Under Plugins -> Add New we can search for and install new plugins. In the search line we look for Court Reservation. In the search results we can already find the plugin which we install and activate by clicking on Install Now and then Activate.
After successful installation, we can switch to the settings of the plugin (Reservations -> Settings -> Courts). The first “court” has already been created. By clicking on Edit, we can enter a name, opening hours and how much days the table will show.
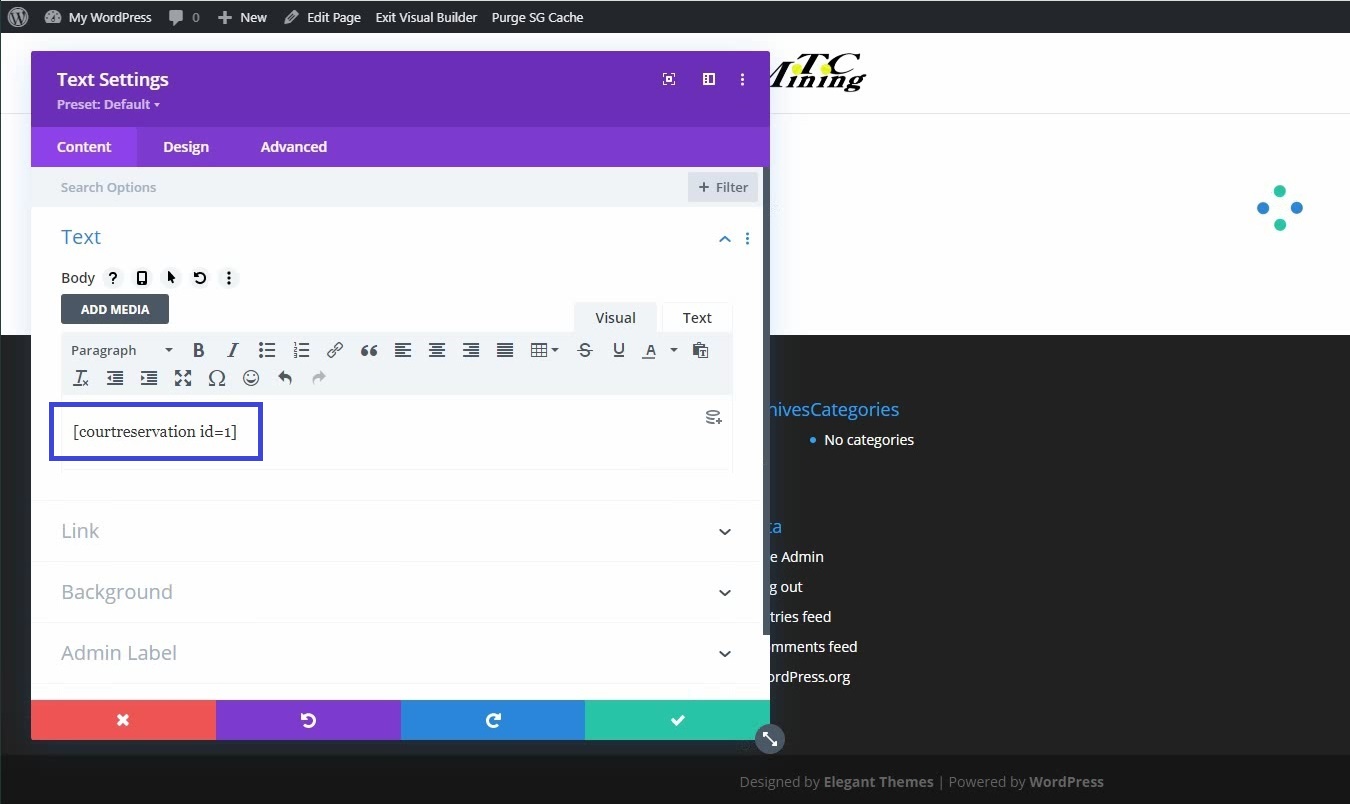
In the tabs Settings and User Interface you can later adapt the reservation system to your individual needs. But first we want to include the reservation table in the previously created page. To do this, we copy the shortcode and switch to the WordPress frontend (top left -> Go to website).
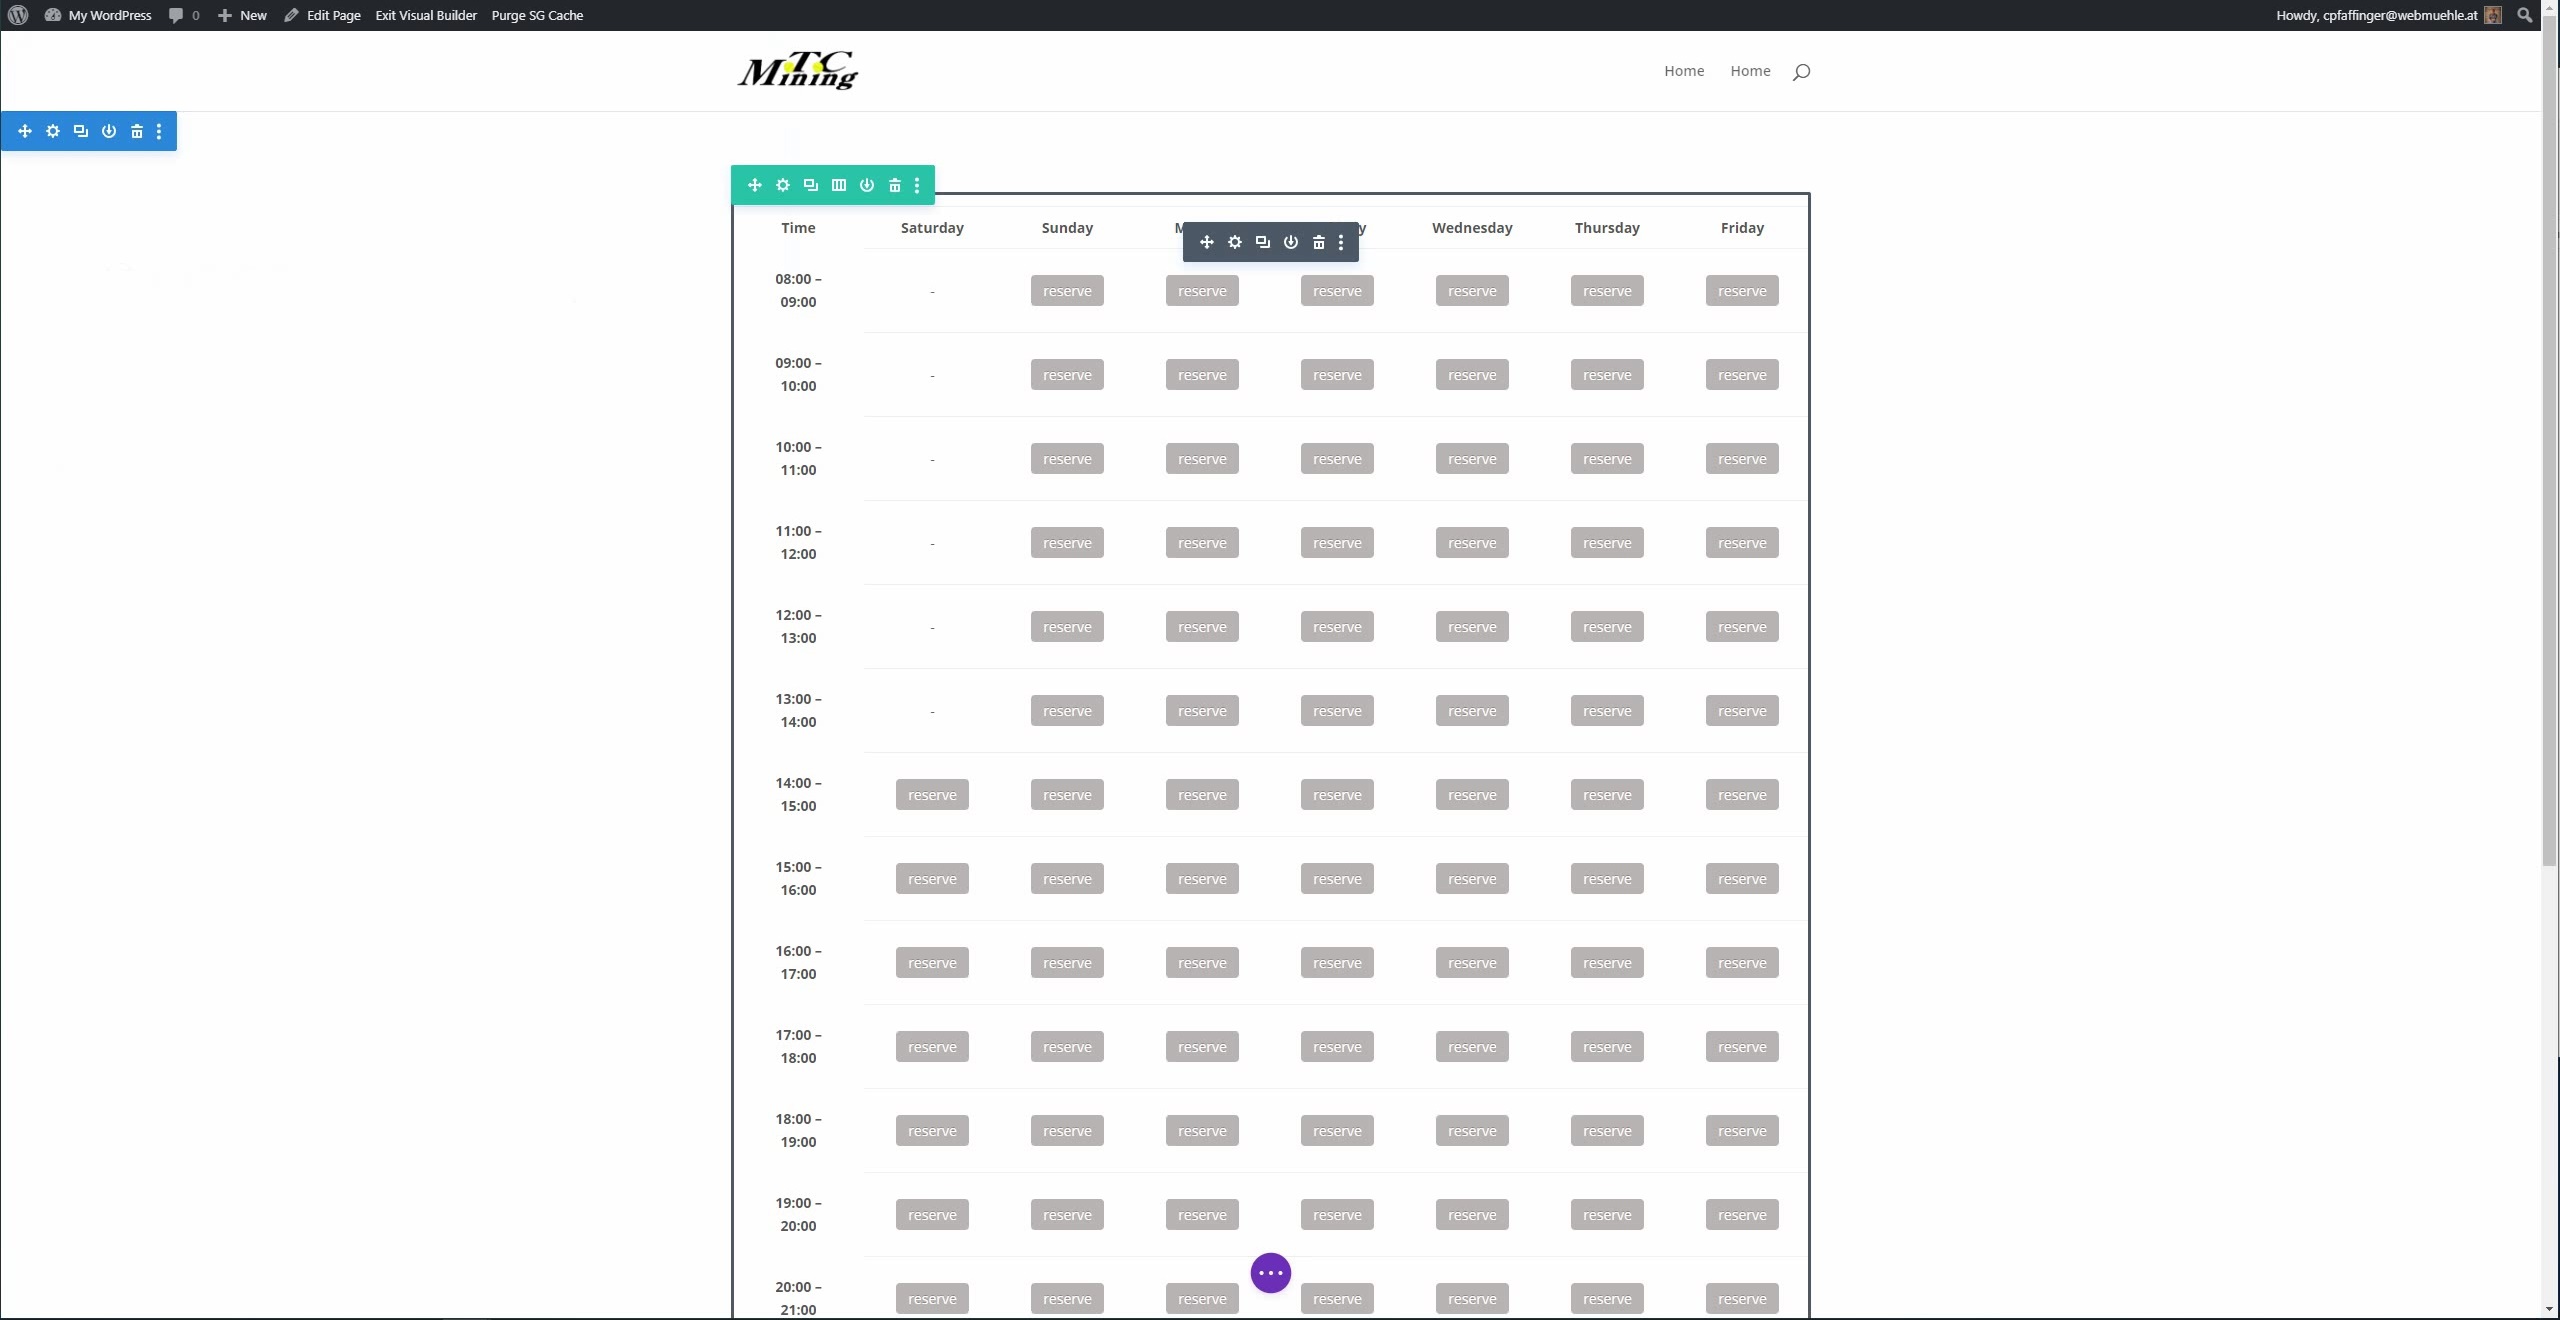
We are back on the previously created page. With one click on Activate the visual editor in the upper black bar, we enter the edit mode. By clicking on the +, new elements can be created. We’ll first create a new row. In this row we can add a text element with another click on +.
In the pop-up window we insert our shortcode.
After clicking on the tick we see our reservation table for the first time.
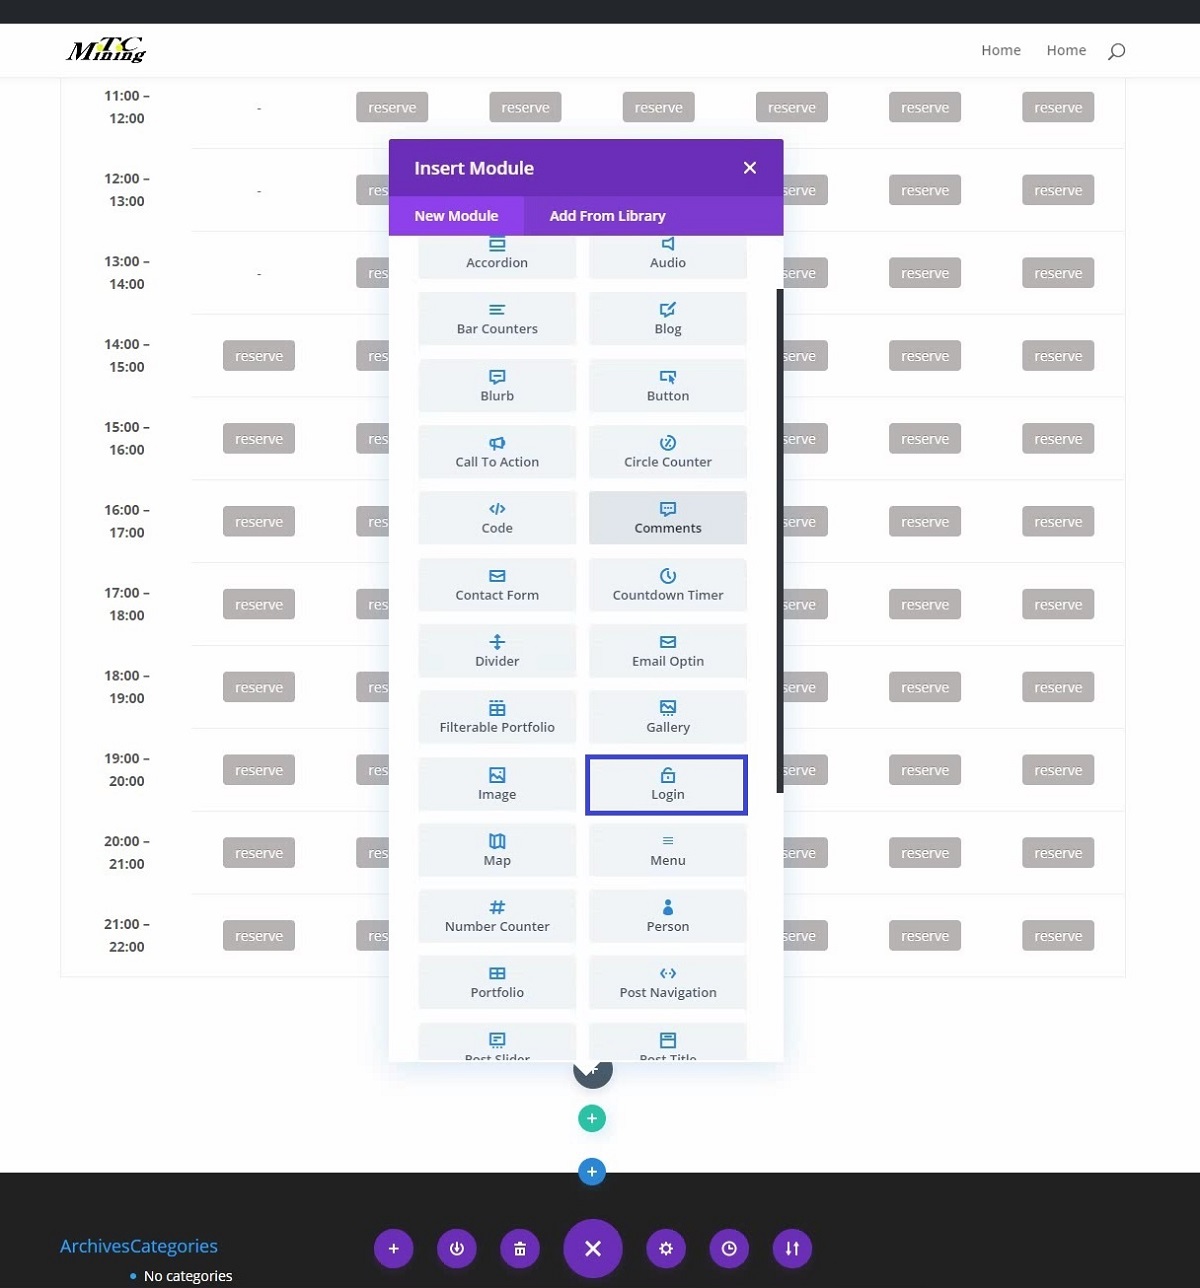
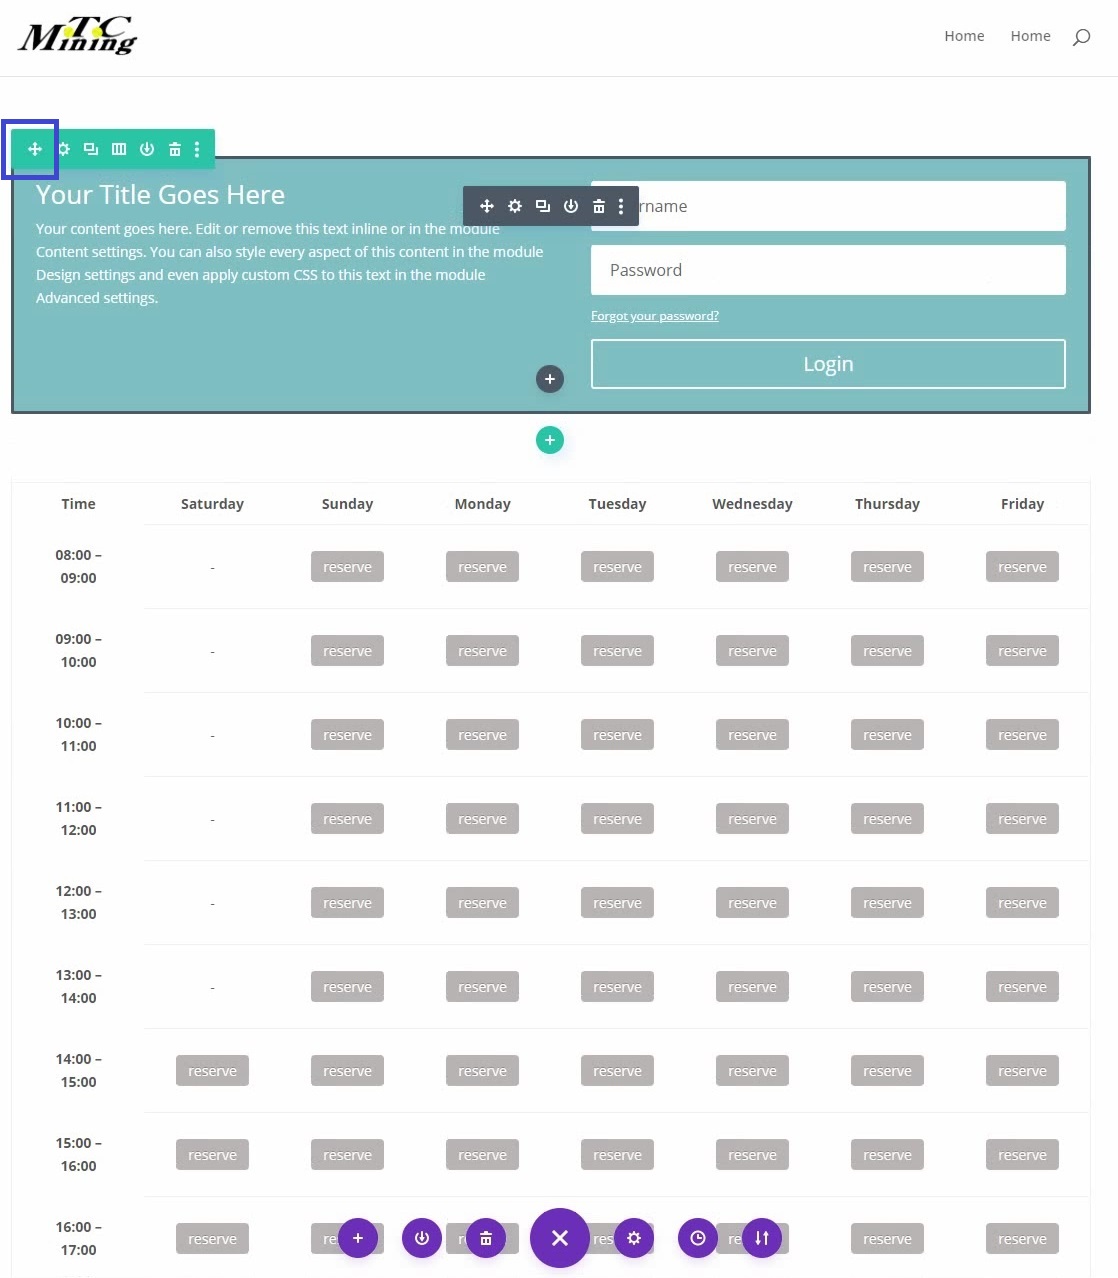
Now only one area is missing. That is a login and register form, where members can register, login or where some description can be put. To create a login area, we click again on the + in the middle of the row and select Login.
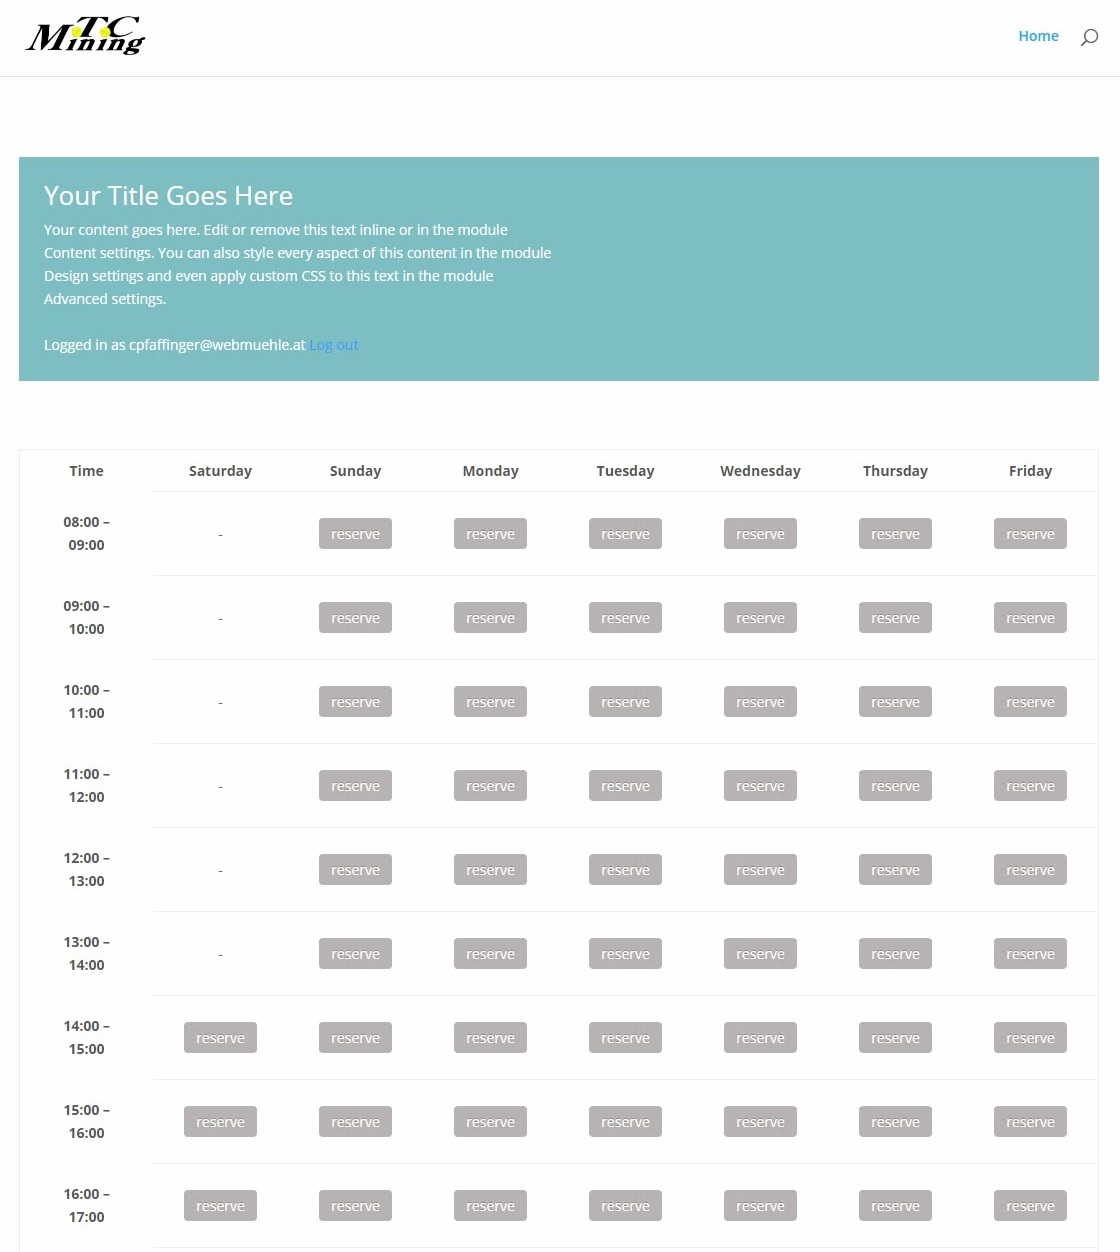
The modules can be moved using drag & drop. Don’t forget to save!
So you have finished your first page of your club homepage. Next you can create another page, upload photos, insert your own logo and create a menu navigation.
Have fun with the further creation of your homepage. If you have any questions, please feel free to contact us at [email protected].
